Showing posts with label ED. Show all posts

2012-04-07

Move the ED download to a work location

These steps begin after you've downloaded one or more EDs that were canvassed in the 1940 U.S. Federal Census, as guided in a previous blog post. The EDs you downloaded from the National Archives (NARA) site are in zip files, each named by state and ED number. This post guides you in extracting the images from the zip file and placing them in a standard location on your computer.
  1. In a directory window, find the files you downloaded in the previous blog post. This is your source directory. How you do this easily depends on your browser. My browser automatically saves files at
    C:\Documents and Settings\Tom\My Documents\Downloads 


  2. In another directory window, make a directory to hold the census images in an organized group. This is your target directory. For example, I use
    C:\Documents and Settings\Tom\My Documents\Genealogy\Locations\USA\KS\MTCH\U.S. Federal Census 1940
    (that is, I have a separate directory for each state—KS for Kansas, county—MTCH for Mitchell county, and each census—U.S. Federal Census 1940).


  3. In the source directly, double-click on one of the zip files. The zip directory opens.

  4. Selectto open the extraction wizard.

  5. In the extraction wizard, select.
  6. In the top field, enter the name of your target directory. You can copy-paste the name from your source directory window or browse for the directory.

  7. Select. The wizard indicates its progress with green bars.

  8. When the extraction is complete, de-select
    and select .

  9. In the directory that shows the contents of the zip file, selectto see other downloaded zip files.
  10. Repeat steps 3 through 9 for each census file in the same county.
  11. Repeat steps 2 through 10 for each census file in other counties and other states.

Save the census downloads on your computer

These steps begin after you've recorded the EDs for a state and county that was canvassed in the 1940 U.S. Federal Census, as guided in another blog post. Using those steps, you have just opened the Census Schedules view. Your working area should look like this.

You can review the actual pages written by the census enumerator in this view, but you can also copy the pages to your computer. (This is downloading the file.) I suggest downloading the file so you cam work without using the NARA computer resources and so you have your own copy of the census record.

  1. Selectfor one of the EDs you've jotted down.
  2. Place your pointer on, and a small window pops up.
  3. Click on the Image box, and select All images.
  4. Select , and you are asked to type the words in the security image.
  5. Click in the answer box, and type the words. 
  6. Selectagain. (If your answer is incorrect, you can use steps 4 and 5 several times until your answer is correct.)
  7. If the download is successful, you may see the file listed by your browser window. (This depends on your browser and its settings.) For example: 
  8. Repeat steps 1 through 7 for any other EDs you want to download.
  9. Go to the next blog post, which guides you in placing the downloaded files on your computer.

2012-04-06

Choosing the correct Enumeration District

These steps begin after you've selected a state and county that was canvassed in the 1940 U.S. Federal Census, as guided in another blog post. Your working area should look like this.

Working area—ED descriptions for state and county

You can choose one or more of these views.
  • If you don't know a name for the area you want a census page for, use the map images to help you find the town, city, ward, or portion of the county (township) and its ED (enumeration district).
  • If you have the name for the city, ward, town, or township, use the descriptions to find the ED. The working area shows the descriptions automatically.
  • If you have the ED, use the ED list to go immediately to the pages you want.

        Map view

        Let's work from the Maps view, which lists all available maps that show the EDs for your county. Usually one map shows the full county and its EDs, and another map shows each city or town that has election wards. Some election wards may have more than one ED.


        1. Selectfor the county or town.
        2. Slide the view bars (at the bottom and right side) to show different parts of the map.
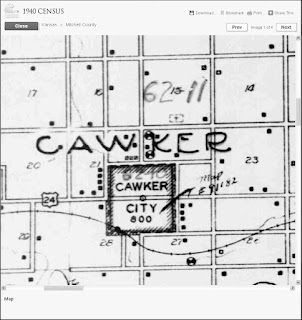
          • The small black squares are houses.
          • Houses in towns are usually not shown.
          • State and U.S. Highways are identified.
          • Railways and county roads are mapped but not always identified.
          • Usually the boundaries of townships are also boundaries of EDs.
          • The ED numbers are usually written in large but fainter numbers. 
          • In the example (right), Cawker township has ED 62-11, and Cawker City has ED 62-10.
        3. Jot down the EDs you want to view. 
        4. Selectto view another page and find other EDs for the county or city.
        5. Selectwhen you've reviewed all pages of the map.
        6. If you want, repeat steps 1 through 5 for another map.
        7. Go to Descriptions view or Census Schedules view, below.

        Descriptions view

        Let's work from the Descriptions view.


        1. Scroll though the groups of descriptions to a group you want to view.
        2. Selectto see all the EDs for the group.
        3. Jot down the ED you want to view.
        4. Repeat these steps for all EDs you're interested in.
        5. When you've found all EDs, select(above the descriptions).

        Census schedules view

        Let's work from the Census schedules view. You can review the actual pages written by the census enumerator in this view, but you can also copy the pages to your computer. (This is downloading the file.) I suggest downloading the file so you cam work without using the NARA computer resources and so you have your own copy of the census record. Go to the next blog post.

        2012-04-04

        How to access the 1940 Census

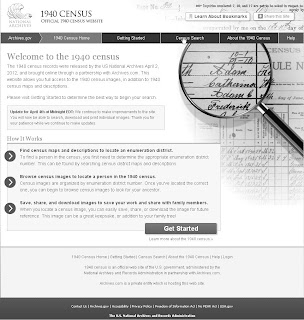
        1940 Census welcome page
        The National Archives released the 1940 U.S. Federal Census on schedule on 2 April 2012. Laws setting up the census—and protecting privacy of those indiiviluals who answered the questions—establish a period of 72 years before the census records can be released. All the previous census records were released on micorfilm, beginning in the 1940s. But now, 70 years later, the records are being released online in files that are easily downloaded for your research whenever you desire.

        Here's the most efficient way to make a set of files from the 1940 census.
        1. Go to the website for the 1940 census. To do this, select this link to the 1940 census. I have set the link to open the census in another window, so you can follow these steps while you find your first records. Just resize both windows and position them side-by-side.
        2. SelectCensus Searchin the three-color bar across the top.
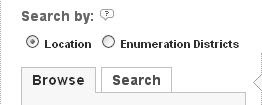
        3. Make sure that the Browse tab and the Location circle are selected (as shown).
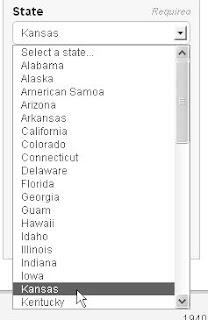
        4. Under State, open the drop-down list and select the state you want.
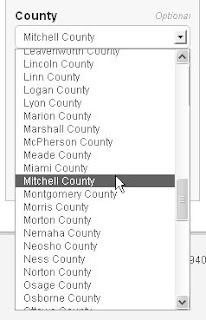
        5. Under County, open the drop-down list and select the county you want. 
        6. Select  at the bottom of the block.
        You're now ready to find the divisions that were assigned to each person who visited each residence and interviewed your family. These divisions are called enumeration districts (EDs), in the parlance of the U.S. Federal Census. Usually an ED is a township in a county or an electoral ward in a city.

        In the next blog post, I guide you in choosing the correct EDs, and later posts guide downloading the whole ED and saving the downloads on your computer.

        Happy searching!